
First, a disclaimer. This is my first tutorial of any kind. I am not any sort of "crafting expert" or "wreath aficionado". This actually the first wreath I've ever made. I just like yarn and I have a lot laying around so I thought I'd use some up in a non-knitting project. So, don't make fun of me too bad. Thanks.

The finished product! Thought I'd lure you in with the beautiful project all sparkly and finished so you'll keep reading...
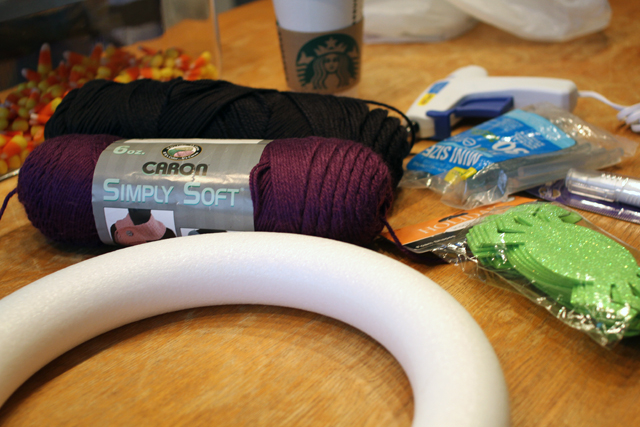
Supplies you'll need:
- 12 inch foam wreath form
- yarn (I used two colors for stripes, Caron Simply Soft)
- fun embellishments (got these sparkly spiders in pack at Jo-Ann's for like $1.29)
- adhesive (I have a glue gun pictured here but I didn't even use it. I used Aleene's Tacky Glue Pen and it worked just fine.)
Optional: Starbucks Pumpkin Spice Latte so you feel all cozy and fall-like.
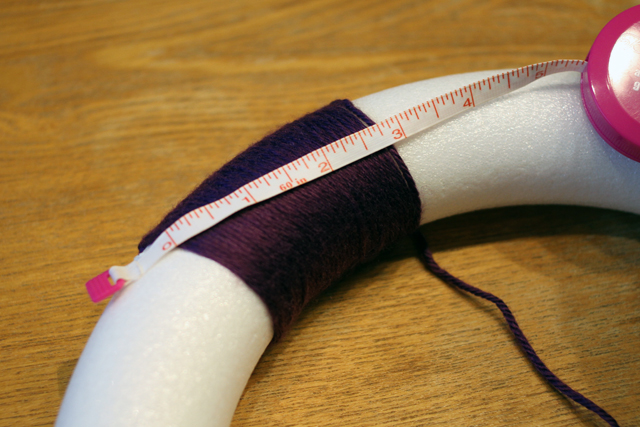
To start the wreath, just tie a simple knot and leave a small (about 1" long) tail of yarn. You can hide the tail (seen in next picture) underneath the yarn you are wrapping the wreath with. Don't drive yourself crazy like me trying to make each yarn strand lie perfectly next to each other. I actually wish I would have overlapped the yarn because when you lie it perfectly, there will be "bald spots" where you can see the foam underneath.
I made stripes so I thought about three inches wide would mathematically make sense. Ehh, not so much. My last stripe ended up a little short but the ribbon hides that transition pretty well, giving the illusion that it all evens out. I think if you made your stripes about two inches wide, you would have better results. But remember, I have not completed college and have not taken a math course in seven years.
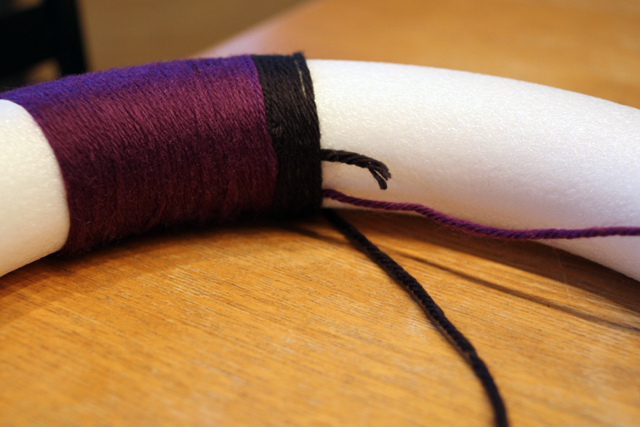
Attach the next stripe the same way you did the first, just by tying a knot. After that, you don't need to cut and re-tie the next color every time. Just carry the yarn on the underside of your wreath, wrapping it with the current color you are working with. Then you can just pick it up and switch when you are ready to change colors.
Here is the wreath all wrapped up, pre-embellishments. You can see at this angle, there are some bald spots. But when you look at it straight on, you won't see them. A yarn with a little bit of fuzzyness to it will help hide this also.
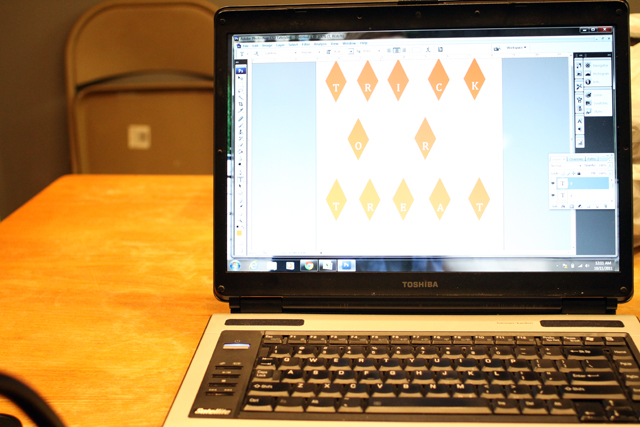
I used Photoshop to create my little pennant diamonds. You could easily use any other program that you are familiar with. All you need to do is create uniform diamond shapes about two inches long and one inch wide. I made my banner say "trick or treat".
Print it out (plain old paper will work just fine) and cut 'em out.
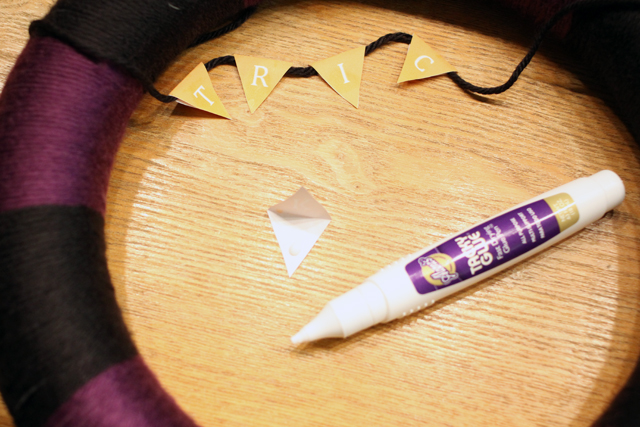
To attach your letters, fold your diamonds in half to create triangles. Place just a dab of glue toward the bottom of the triangle. Then fold over the yarn and press down. I didn't want my letters to be glued to the actual string because I wanted to be able to move the letters around so I could space them out the way I wanted them to be.
Then, tie the pennant banners to your wreath. I used the same yarn I used to wrap the wreath to make the pennant banners. I just tied it on either side and left a little bit of slack. I tried my hardest to position it so the knots were on the backside of the wreath.
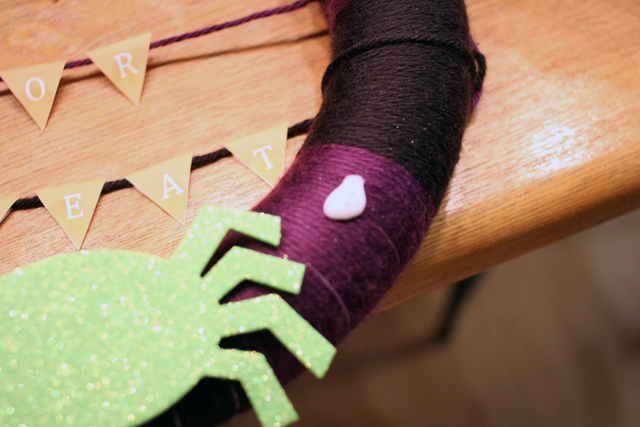
Then, use more glue to attach your sparkly spiders, or what you have.
This glue worked really well. After you're done, turn it over and let set over night. This glue dries clear, so I also applied some glue onto the knots that were created when I tied the pennant banners. Just to help them keep their place.
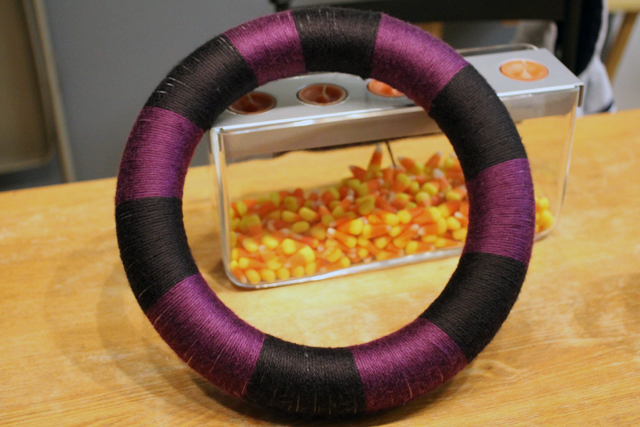
Tie a ribbon at the top and there ya go, a finished Halloween wreath! Your siblings will even think that you bought it at Target (no joke. this was the biggest compliment i could have ever received).

I LOVE this wreath! So cute!
ReplyDeleteThat is awesome. You're so crafty! :)
ReplyDeleteOh I just love this idea! You are so creative. Yes, I would love if someone gave me that compliment too!
ReplyDeletesuper cute! also, i love your sense of humor :P
ReplyDeleteThis looks easy enough! I might be able to do this!
ReplyDeleteThis is so cute!! New follower from followers fest!
ReplyDeleteThis came out so great!! I haven't done a yarn wreath yet, but I'm itchin' to try one. Thanks so much for the sweet comment on my Spooky Halloween Wreath : )
ReplyDeleteJaimee @ craft-interrupted.blogspot.com
Super cute wreath!! Thanks for linking up :)
ReplyDeleteI love the bunting on this wreath! It caught my eye on the link party at CSI Projects. So cute!
ReplyDeleteJust saying Hi from Style Outside the Box! We would love to do a link swap with you! :) New Follower from Oct Fest! :) Come say HI at http://www.styleoutsidethebox.blogspot.com/ Don't Forget to Enter Our Blog Fest Contest!
ReplyDelete:)
That wreath is darling! So glad I found your blog through the followers fest.:) I am now following! xoxoxo
ReplyDeleteThat's such a cool wreath. I made a "fall" one with browns and reds, but I really like the Halloween theme behind yours!
ReplyDeleteNew follower from follower fest.
http://shrinkingmommy.blogspot.com
Oh my Gosh SOOOO cute!
ReplyDeleteI love all the wreaths that are popping up!
New follower from the restless blog hop!
http://mommamadeit.blogspot.com
Hi Melissa!!
ReplyDeleteWHat a fun and colourful wreath I love it!
I love the colours and design!
And thanks for visit my blog too!!
Cheers
Andrea
Did you end up using all of your yarn? How much would I need if I wanted to make two identical wreaths?
ReplyDelete